,


Seller Registration
1. Seller visits Goodada website. www.goodada.co.za
2. Seller clicks on the “Register Now” icon in the top right of the Goodada Page

.jpg)
-
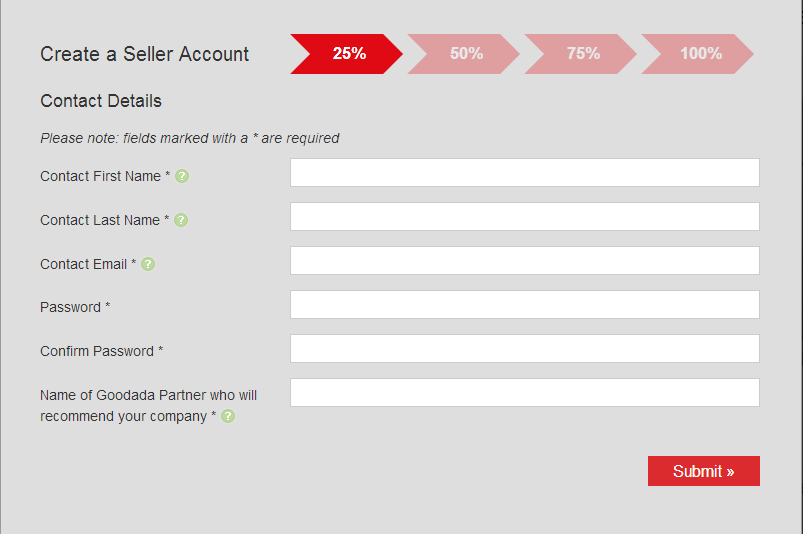
Seller completes – “Create a Seller Account Form” (25% of registration)
-
Note that this page must be completed for Goodada to create your account
-
This section is for the contact person whom Goodada will be able to contact.
-
The details in this section are for Goodada’s records only.
-
The information section is will NOT BE DISPLAYED to the public.
-
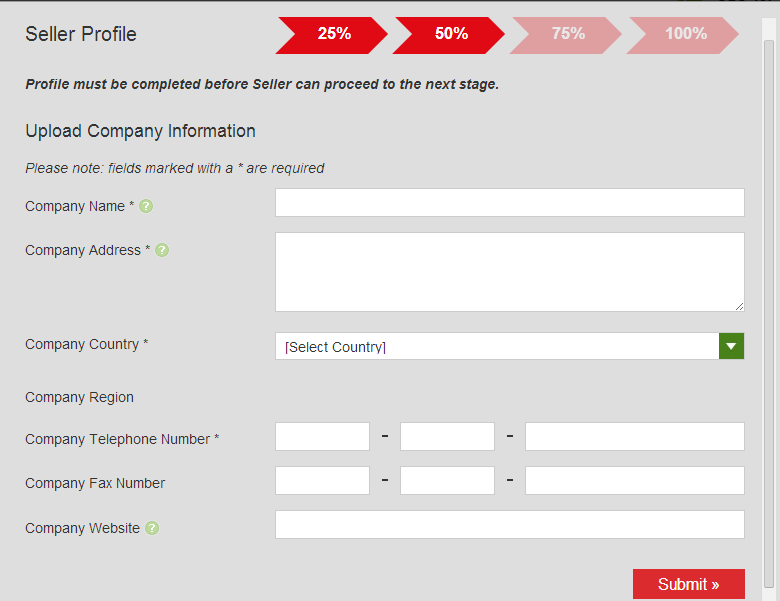
Complete Seller Company Information (50%)
-
All information must be in English
-
This information will be displayed to the Public
-
All Pages must be completed before Products can be entered.
-
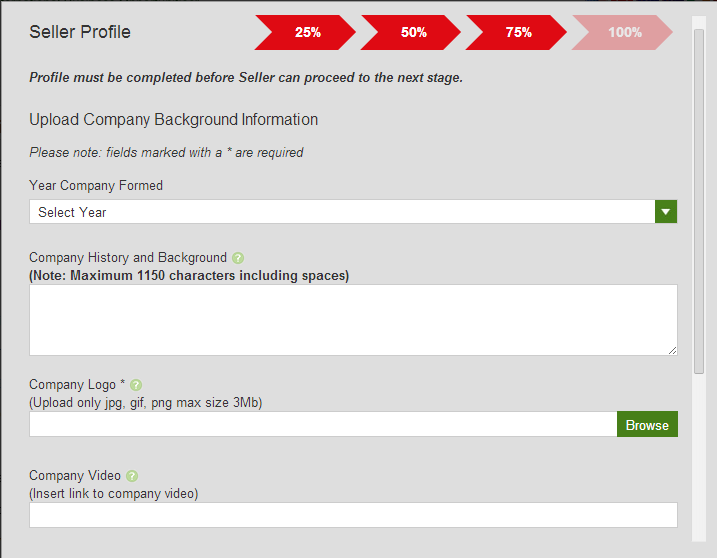
Complete Company Background information (75%)
-
All information must be English
- You must put in mandatory information such as: Year Formed, Company Logo, Exterior Photos of Buildings
- Include some background information on your company. Note it will increase your ability to get more sales by almost 30%
- If you have a company video please add it. This will make your company more attractive to new customers by almost 20%
- Include some photos of your Factory. This will make it easier for new customers to choose you.
-
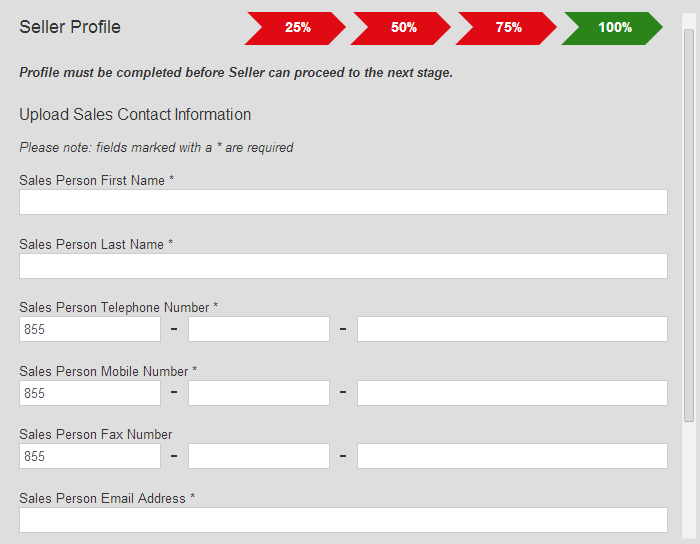
Complete Information on Sales contact for Visitors to Goodada
-
All information must be in English
-
This is the information of the Sales Person that the customer will communicate with.
-
A clear photo of the Sales person is required
Section 2: Seller logs onto Goodada website
-
Seller clicks log in icon

-
Seller enters in their email address and password
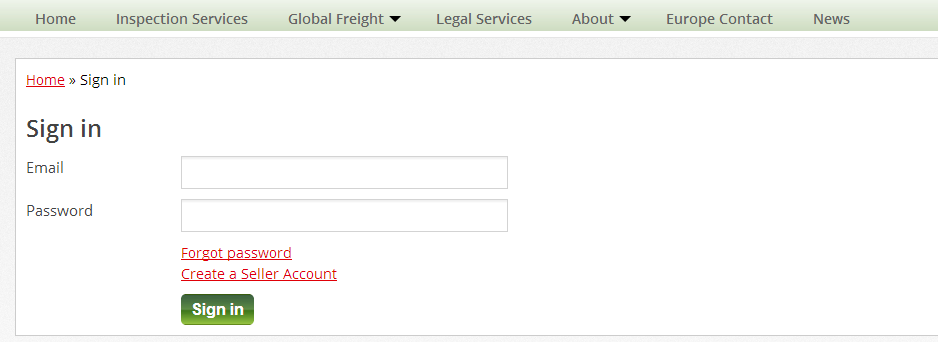
Section 3: How to use Seller Control Panel on Goodada
-
Seller can confirm their Account Status on Goodada
There are 3 Seller Account Status
i.Verified
ii. Awaiting Verification
iii. Suspended

- There seller has 5 Action icons located on the top right of the Control Panel
-
Products – This allows the Seller to Add/ Delete/ Amend their Products on Goodada
-
Profile – This allows the Seller to update the information about their Company on Goodada
-
Contact – This allows the Seller to amend the Contact Details for their company
-
Logout – This allows the Seller to exit their control Panel
- Contact Goodada – If the Seller requires any information they can ask Goodada.

Section 4: How to Add/ Edit/ Delete products on Goodada
1. How to Add a new Product onto Goodada
**Note** You must have an image of the Product available **Note**
- Click on the Blue Button titled “Products” on the top right hand corner of the screen
- Click on the “Add New Product” Button
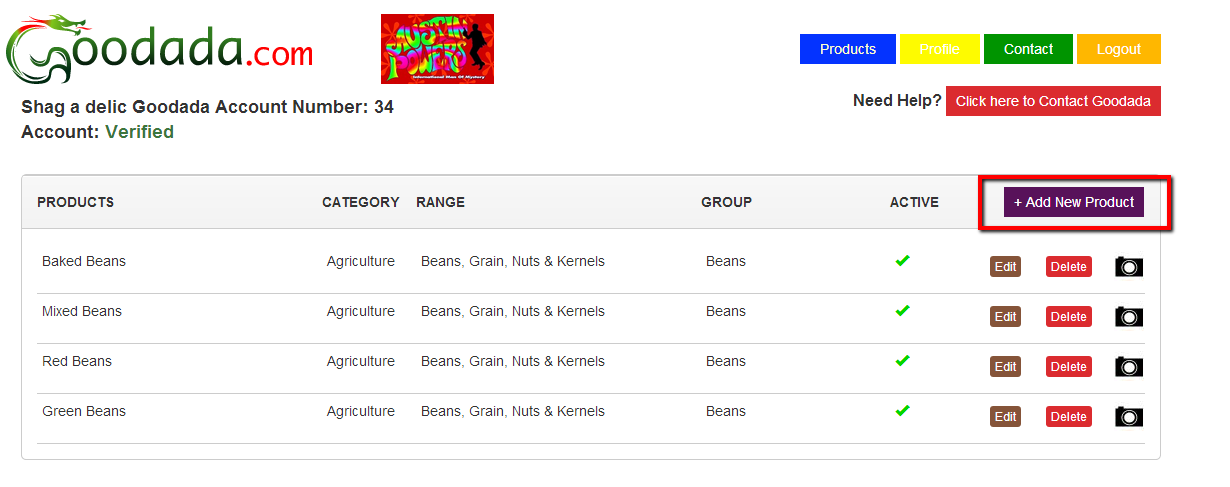
- Fill out the information required – IN ENGLISH
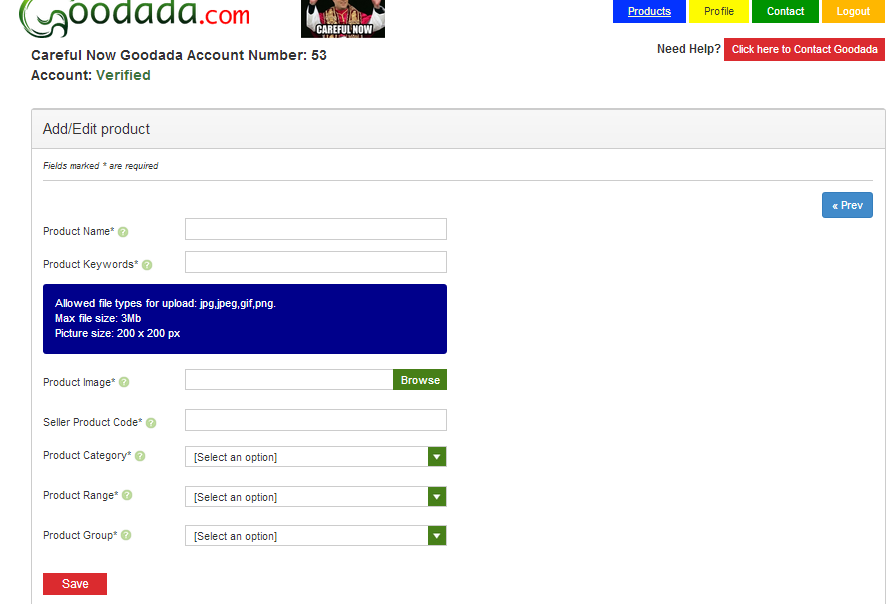
- Suggest some Keywords – This will assist the user in searching for your product.
- Assign the Product to the correct classification on Goodada Database
- Press the Save Button
2. How to Edit a Product
- Click on the Blue Button titled “Products” on the top right hand corner of the screen
- Select the Product line that you wish to edit
- Click on the brown “Edit” Box on the Product Line
- Make the changes in any of the sections that you require
- Press the Save button at the bottom to save the changes
3. How to Delete a Product
- Click on the Blue Button titled “Products” on the top right hand corner of the screen
- Select the product line that you wish to Delete
- Click on the Red “ Delete” Box
- A Warning message will appear asking you if you want to confirm deletion. Please “Yes” if you wish to confirm the deletion
Section 5: How to Edit your Company Profile on Goodada
-
Click on the Yellow Button titled “Profile” on the top right hand corner of the screen.
-
You can only edit your “Company Profile” and “Background Information” in this section.
-
Press the “Save” button to save the changes to the company Profile.
Section 6: How to Edit the Sales Contact Information on Goodada
- Click on the Green Button titled “Contact” on the top right hand corner of the screen.
-
You can edit the contact details of the Sales.
-
Press the “Save” button to save the changes to the Sales contact information.
Downloadable Instruction manual available here Seller Guide


